Wednesday 29 August 2018

How to Fix iPhone Not Showing Up in iTunes (2018 Updated)


How to Fix iPhone Not Showing Up in iTunes (2019 Updated)
1. Check USB Cablecar, charging, iphone

There are many reasons why your iPhone not showing up in iTunes. One of these reasons could be because of bad connectivity. You can test if your USB cable is defective by using another cable to see if your iPhone will get detected by your PC. You can also check to see if the USB port of your iPhone is damaged or has any dirt; Lastly, you can try connecting your iPhone to another computer to see if the computer USB port is working properly.You may also like:Gihosoft Mobile Transfer: 1 Click Data Transfer from Phone to Phone


2. Check iTunes Version

If you have recently bought an iPhone and connected to the old version of iTunes on our PC or Mac, your iPhone not showing in iTunes may be a problem you may experience. Every new iPhone will be having the old version of iTunes and will need to be upgraded to the new version of iTunes so that your iPhone can show up on iTunes.


3. Reset Location and Privacy Settings

Some of the buttons you press without knowing what they do on your iPhone could be the reason your iTunes not recognizing iPhone. Like if you accidentally pressed the Don't trust button on your iPhone. You can easily fix this problem.

You may also like:Gihosoft iPhone Data Recovery

Must Read:Gihosoft Free Android Data Recovery

Must Read:Jihosoft iTunes Backup Unlocker

Jihosoft iTunes Backup Extractor free is a powerful tool to recover and extract important data from iPhone, iPad & iPod touch backup on Windows or Mac.

You may also like:

Gihosoft Total Video Converter is a professional all-in-one video tool that enables you to convert videos and audios into various different formats.You may also like:online youtube downloader

Step 1: Go to your iPhone Settings.

Step 2: Then click on the General tab.

Step 3: Lastly click on Reset location & privacy tab.


When you connect your iPhone again the Trust this computer will appear. Please note that this may also delete some of the iOS apps setting that are allowed to use your location.
4. Uninstall Security Software on Mac

If you install security software made by other companies to your iPhone other than Apple, iTunes not connecting to Apple servers or your iPhone may be a problem. You may even get a numeric error message when you try to sync, restore of backup your iPhone. To fix this problem:

Step 1: Hold down the Option key, click on the Apple menu then click on System information or System report.

Step 2: A list will be displayed on the left. Select USB.

Step 3: Under the USB device tree check to see if you can see your iPhone, iPad or iPod then uninstall the third party security software.
5. Update Driver Software

Sometimes iTunes not recognizing iPhone may be caused by driver software meaning that your device's drivers need an update.

Step 1: On your computer right click My computer, tap on Properties and click on Device manager.

Step 2: Right click on Apple mobile device USB driver.

Step 3: Then click on Update driver software.

Step 4: Restart your PC, connect your iPhone to your computer then open iTunes to see if your iPhone is recognized.


6. Reinstall Apple's Windows Drivers

At times your Apple drivers will not work properly making your Windows PC not to recognize your iOS device even if you click Trust this computer many times. The drivers on your device could be causing iPhone not showing up in iTunes and need to be reinstalled. You can do this by:

Step 1: Close iTunes then using a USB cable connect your iOS device to your PC. Click on the Start menu then tap on Device manager. Click on the Device manager option that appears.

Step 2: Under Portable devices, search for your iPhone or iPad in the device manager. Once you have found your device right click on it and choose Update driver software.

Step 3: A Window will pop up then select Browse my computer for driver software.

Step 4: Then select Let me pick from a list of device drivers from my computer.

Step 5: On the next screen click on Have disk button.

Step 6: On the Install from disk window, click the Browse button then navigate to c:\program files\common file\apple\mobile device support\drivers\usbaapl64.inf. Double-click the usbaapl64.inf file to select it then click Ok in the Install from disk window. If you are using the older 32-bite computer, the driver may be in c:\program files (x86)\common files\apple\mobile device support\drivers instead.

Step 7: Your computer will then install the drivers and upon completion, close the device manager then restart iTunes. Your device should be recognized without any problem.

Tuesday 28 August 2018

16 Best Ad Blocker Apps For Android (Our Favourite Collection) 2019 Top List


16 Best Ad Blocker Apps For Android (Our Favourite Collection) 2019 Top List

If you’re fed up of ads popping up on your Android device every time you try browsing, downloading, or operating an app, you’ve touched down the right runway.

Sponsored Ads: With Gihosoft Free Android Data Recovery Software, you are no longer afraid of data loss!Gihosoft Free Android Data Recovery

The digital world has expanded beyond our imagination, with an audience-reach bigger than ever before. And hence, large chunk of our society now uses the www to further their career; be it a business trying to promote a product/service or a part-time blogger trying to monetize their blog-site. Most ads are in sync with your interests. But as creepy as it may sound, they do this by tracking your browsing history or social activities. However, there are still many ads which are just outright annoying, repetitive, and irrelevant.You may also like:Gihosoft iPhone Data Recovery

In the case of websites which offer their content for free, displaying ads become critical to their survival, or to gain more popularity. Nevertheless, quite a few of them abuse this money-making opportunity, plaguing the entire site with unwanted commercials and affecting a user’s overall experience; to the point where it becomes absolutely necessary to restrict ads. Recently, we have also shared Best Screen Recording Apps for Android.


We’ve rounded up a comprehensive list of the top-rated Ad-Blocker apps for Android that you can get to get rid of those pesky advertisements. Take a look:

Best Ad Blocker Apps For Android 2019

AdAway:

One of the most commonly reviewed Ad-blocker app to have received tons of appreciation, is AdAway. It is perhaps the most effective and reliable app that you can currently get. It makes use of host files to reroute ads to 127.0.0.1; be it any kind, i.e. pop-ups, game-ads, banner ads, etc. You can even manually blacklist or whitelist websites if you need to! However, one very important point to note is that though AdAway is an open-source app that’s completely free to download, it is only available to those with rooted phones. If you ask us, we’d say its totally worth rooting your phone for this app, if blocking ads is a huge priority for you.

Download

AdClear by Seven:

AdClear is for you non-rooted Android folks and can be accessed for free. It shuts out not only the encrypted or intrusive ads that you come across on several websites but also deters ads on YouTube. To boot, this app has Firewall and Doze features which help a lot in reserving battery and bandwidth, while increasing page load-times. You can also be assured that no malware would enter through any advertisement when using AdClear. Although it doesn’t give you the level of control AdAway does, it surely does its work incredibly well.

Download

Adguard:

Adguard can be downloaded by both, rooted and non-rooted Android phone users. It is an open-source app that you can download straight off the Google Play Store, for free. Similar to Adclear, this app too is VPN-based so aside from barring ads on the web, you can also avoid them across other applications including games. What’s more? Adguard is highly customizable and allows you to pick from 20 different rule-lists pertaining to filtration for ad-blocking. Undoubtedly, it is one of the best ad blocker apps for Android phone. Having said that, the only limitation is that it doesn’t work on any other browsers except Yandex and Samsung Internet.


DownloadQR-Code

Adguard Content Blocker

Developer: ADGUARD SOFTWARE LIMITED

Price: Free

Adblock Browser/Plus:

Unarguably, one of the most popular and efficient ad-blocker apps on Android, Adblock Browser is an open-source app which is available officially on the Google Playstore, for free. Its cousin, Adblock Plus is published by the same developer, albeit, with a few key differences. The Adblock browser works extremely well if you wish to only keep the ads at bay while browsing on your phone. But if you want more features, such as a system-wide ad-blocking including pop-ups, banner ads, while keeping your device safe from any malicious viruses, you may want to get the Adblock Plus. That said, its suitable solely for Samsung users running the Samsung Internet 4.0 or higher. Note that both these apps function on rooted ((more features and customization) as well as non-rooted phones.


DownloadQR-Code

Adblock Browser for Android

Developer: eyeo GmbH

Price: Free


DownloadQR-Code

Adblock Plus for Samsung Internet - Browse safe.

Developer: eyeo GmbH

Price: Free

DNS66:

If you’re a tech-savvy person, you might be aware that the VPN-based ad-blockers are the best type as they go down to the DNS level in order to block ads and host names. Basically, such apps use DNS to generate a local VPN interface which then receives all the server-traffic, thereby blocking ads not only on your browsers but across the entire mobile system. These apps are far more advanced and enhance your phone’s overall performance as well as battery-life. DNS66 is perhaps the best app in this category. What’s more? You don’t need a rooted device to install this app. The only downside (or upside, depending upon how you look at it), is that it might seem slightly difficult to use due to its advance features.

Download

Blokada:

Blokada is a robust ad-blocker for Android that offers superlative speed, stability, while ensuring minimal battery and data usage. As with majority of the apps mentioned on this list, Blokada is also an open-source service that is free, and easy to use. It keeps your personal information safe and allows you to filter the websites that you wish to be blocked or unblocked. We’ve gone over a legion of forums and review sites before listing this app here and can confidently recommend it to you. However, you must keep in mind that Blokada is not available on the Google Playstore.

Download

Free Adblock Browser:

As the name suggests, Free Adblock Browser is essentially an Android browser which let’s users enjoy a web-experience sans ads, focusing more on the content they’re actually looking for. You can use it to do away with ads while browsing, pop-ups, auto-play commercial videos, and banner ads. Similar to Blokada, this service protects you from online trackers who try and extract data or consumer behavior. Additionally, it is also very battery-efficient and doesn’t eat up data more than required. The best part? It is officially available on the Playstore and is very user-friendly so if you just want a simple app that blocks ads on your browser without going through too much trouble, this is the one to get!


DownloadQR-Code

Free Adblocker Browser - Adblock & Popup Blocker

Developer: Adblock - Rocketshield, Inc.

Price: Free+

You may also like best call blocker apps for Android.

Adblock Fast:

Adblock Fast is much like the other ad-blockers listed here. It is free, can be downloaded from the Playstore, and does not require you to root your Android device. However, the most unique feature of this service is that unlike other apps, it even blocks “acceptable ads” so an ad-free web experience in the truest sense is guaranteed. Other than that it also offers least possible usage of disk space, CPU cycles, and memory space. All the good stuff aside, Adblock Fast is only accessible on devices with Samsung Internet browser (4.0+) so make sure to install that before getting the app itself.


DownloadQR-Code

Adblock Fast

Developer: Rocketship Apps

Price: Free

TrustGo Ad Detector:

TrustGo Ad Detector works in a slightly different model as compared to all the other ad-blocker apps mentioned here. Although it does block ads, its chief function is to ensure utmost security while using a mobile application. Simply put, it’ll scrutinize all the apps on your phone and detect the ones that contain ads which pose a threat to your privacy. This is very useful because there are numerous mobile ad-networks out there who try and pilfer personal information. Bear in mind that this app is not available on the Play Store and needs to be installed via a 3rd party APK file using the link given below.

Download

AppBrain Ad Detector:

As you can possible guess by the name itself, AppBrain Ad Detector is an app quite similar to TrustGo, albeit, with an incredibly smart in-built technology. This app is capable of identifying over 70 aspects of mobile apps which can be a cause for annoyance. These include push notifications, “desktop icon spam ads”, and apps that steal or share your personal information. These features help you to understand which software have an access to your data via any accounts or messages; so you can ultimately remove them. What’s more? Through AppBrain, you can also find out which mobile ad-networks are ingrained in the apps (just for reference). Apart from this, of course, it blocks all pop-ups and ads.


DownloadQR-Code

AppBrain Ad Detector

Developer: AppTornado

Price: Free


Block This:

Yet another free and open-source DNS-based ad blocker for Android, Block This deserves a mention even though it may not be as popular as the other apps. It works on non-rooted phones. However, if you try looking for it on your Play Store, you wouldn’t find it any longer. It now has to be downloaded separately from their official website. That said, Block This boasts of multifarious features including enhanced security, decreased data usage, shield from malware, faster browsing speeds, and less mobile data traffic. Furthermore, it gets rid of all kinds of ads including pop-ups, cookies, and browser ads be it in any form – audio, video, or image. An additional feature of this app is that it allows you to sidestep the censorship dictated by your internet provider thereby enabling you to access all sites.

Download

NetGuard:

NetGuard is an excellent ad-blocker that supports both, rooted and non-rooted Android devices. Though not readily available on the Google Play Store, you can easily get it online using our download link. Its a breeze not just install it but also use it since it sports a rather simple and clean interface. This software sets itself apart in that it is ultra customizable. You can manually add websites and apps to the list that you want to deny access your internet connection to.

Download

CM Browser:

CM Browser is a simple, yet efficient ad-blocker that can be availed for free on the Play Store. It aids in blocking pop-ups and other ads while browsing, thereby helping you to enjoy surfing the net or downloading content without any interruptions. As with many ad-blockers, CM browser too, offers increased web-security and protection of identity. What’s unique about this app is that it can automatically detect the videos which can be downloaded and provides a download link for the same. Also, all your browsing history will be erased right after exiting the app.


DownloadQR-Code

CM Browser - Ad Blocker , Fast Download , Privacy

Developer: Cheetah Mobile Communications

Price: Free

Brave Browser Fast Ad Blocker:

Brave Browser is a free, all-in-one ad-blocker that conceals your identity and personal data from network trackers, by means of HTTPS request enforcements. Obviously, it helps you get rid of ads while focusing on saving battery, deterring cookies, boosting over all speed and performance of the device. Note that in actuality this is a browser and does not block ads or push notifications that you get from other apps on your phone.


DownloadQR-Code

Brave Browser: Fast AdBlocker

Developer: Brave Software

Price: Free

Cynergy Adskip for YouTube:

As you can tell by the name, Cynergy Adskip automatically skips the advertisement and begins playing the video. It is free, and does not need you to root your device. Its function may sound very basic; however, it does come handy especially for those who love watching YouTube videos on a daily basis. One thing you must remember is that in order to use this software, you need to enable accessibility service through which it will be able to tap advertisements.

Download

YuBrowser with Ad Filtration:

If you’re tired of slow browsing speeds on your phone, you might want to consider checking out YuBrowser. This app is especially meant for people using phones running on Qualcomm Snapdragon processor. The service claims to boost browsing speeds by up to 40%, in certain cases, even speedier compared to Google Chrome! As mentioned alongside its name, it also filters ads while keeping you safe from privacy violation. YuBrowser comes with a massive list of features including power saving mode, night mode, swipe controls, web refiner, web defender, and webpage translation.


DownloadQR-Code

YuBrowser - Fast, Filters Ads

Developer: MoKee Open Source Team

Price: Free

To Summarize:

Ad-blockers are unbelievably useful tools that can really improve your mobil’ing experience by shutting out pointless and mundane ads that tend to eat up our phone’s batteries, data, and space. They also make sure that your personal information remains personal. Most of the ad-blocker apps listed above do work on non-rooted Android phones. However, there are a few of them which are only compatible with rooted devices so you could either skip them or try rooting your device. Keep visiting our blog Dreamy Tricks to get latest Tech updates.

Let us know if the apps mentioned above worked for you!

More Powerful Apps You May Like:

Top 10 Best Free Android Photo Editors in 2018

Top 10 Best Free Video Editors for Android in 2019

10 Best Free Audio Players for Android in 2018


How to flip on Dark Mode in Twitterrific


How to flip on Dark Mode in Twitterrific
Dark Mode and battery life

User interfaces sporting predominantly black or darkened elements save battery power on OLED devices like iPhone X over devices that use the more ubiquitous LCD technology.

The reason: OLED’s lack of backlights.


Liquid crystals in an LCD display do not emit light directly. Instead, they require a power-hungry backlight designed to illuminate the pixel array. On the more advanced screens based on the superior OLED display technology, the pixels light up on their own, individually.You may also like:Gihosoft iPhone Data Recovery

Must Read:Gihosoft Free Android Data Recovery

Must Read:Jihosoft iTunes Backup Unlocker

Jihosoft iTunes Backup Extractor free is a powerful tool to recover and extract important data from iPhone, iPad & iPod touch backup on Windows or Mac.

You may also like:

Gihosoft Total Video Converter is a professional all-in-one video tool that enables you to convert videos and audios into various different formats.

You may also like:online youtube downloader

TUTORIAL: How to enable Dark Mode on macOS Mojave

Thanks to this inherent characteristic of OLED technology, black pixels do not consume power at all. In other words, a user interface with predominantly black elements will consume less power on an OLED-based display than on one based on LCD technology.

Here’s how to flip on Dark Mode in Twitterrific’s iOS and macOS apps.
How to enable Twitterrific Dark Mode

Twitterrific’s iOS and macOS apps support theming.

At the time of this writing, the apps were shipping with three user interface themes: the default Light look, in addition to the Dark and Black themes. Here’s how to switch on Twitterrific Dark Mode and make the most of your iPhone X’s gorgeous OLED display in Twitterrific.
iPhone and iPad

1) Open Twitterrific on your iPhone or iPad.

2) Tap your avatar in the upper-left corner to slide the menu into view.

3) Tap the Appearance Prefs icon located at the bottom center of the panel.

4) Tap the Dark theme button then select Black from the popup menu.


You’ll see the results in real time on your desktop without having to close the settings window (you can also adjust your font, avatar, line spacing and in-app brightness). Switching to the Black enables greater contrast and clarity throughout the app.

TIP: To manually switch between Light and Black theme on the fly, just swipe horizontally across your timeline in Twitterrific with two fingers. You can also tell the app to switch to the right theme based on your current time and location.


You can do so by tapping the Auto Day/Night option, below theme selection. The app will now automatically switch to the Dark theme at dusk at your location. The app will use Dark theme until dawn the next day, when it’ll automatically switch back to the Light theme.

As much as I love Twitterrific’s Light theme, it gets bright when it’s dark out. Therefore, I make sure to set the app to automatically change themes at night. If you bypass this feature by manually switching themes, the setting will be overridden the next time you launch the app.
Mac

1) Open Twitterrific on your Mac computer.

2) Choose Preferences from the Twitterrific menu or press Command,.

3) Click the Appearance tab.

4) Click the popup menu next to Timeline theme, then choose Black.


As a reminder, you can switch between Light, Dark and Black theme at any time, on the fly, simply by venturing into Twitterrific’s preferences.


Twitterrific themes, from left to right: Light, Dark and Black.

And that’s all there’s to it, really!
Dark theme or pure black theme?

As mentioned, Twitterrific offers a darker look sporting dark gray elements for that subdued appearance, as well as a pure black theme that puts emphasis on black elements so that profile images, attachments and other media pop.

View image on Twitter


Twitterrific@Twitterrific

Here’s a comparison of the old Dark theme vs the revised dark & new black themes in today’s update. Greater contrast & clarity throughout the app

4:42 AM - Dec 14, 2017


109


71 people are talking about this

Twitter Ads info and privacy

In December 2017, Twitterrific’s revised dark look superseded the previous dark theme.
Dark Mode in macOS Mojave

Apple’s implemented Dark Mode for the first time in its desktop operating system with macOS Mojave, available system-wide and within stock apps, like Mail, Photos and Messages.


Dark Mode and the Finder’s new Gallery View on macOS Mojave

In addition, the firm’s provided developers with a Dark Mode API so they can add support for Mojave’s Dark Mode to their apps (iMazing was the first app to take advantage of it).

On Mojave, you can also turn on Dark Mode for email messages in Mail.
Dark Mode in iOS

iOS has no such thing as a system-wide dark interface as of yet, but rumors are suggesting that Dark Mode could become available on iPhone and iPad with the launch of iOS 13 or iOS 14 next year or in 2020, respectively.


As evidenced by the screenshot above, Apple curates a list of third-party iOS apps that come with a custom black or dark theme. Titled “Does This App Come in Black?”, this handy list is viewable on the web and App Store.
About Twitterrific

Twitterrific is one of the best Twitter alternatives for those who miss Twitter’s Mac app or wish that the micro-blogging startup didn’t severely limit third-party clients with API changes.

Twitterrific for iOS is a freemium download from App Store with optional IAP upgrades available to unlock advanced features such as ad removal and more.

Sunday 26 August 2018

How to Fix iPhone Control Center Not Working A Step-Wise Guide?


How to Fix iPhone Control Center Not Working?
1. Check Access Within Apps


Some people have problems opening the Control Center within apps. If this is the case for you, it is likely that you may have accidentally turned off "Access within Apps", or some of your operations on iPhone changed the setting automatically. When this feature is turned off in settings, you can only access the Control Center from the home screen. Go to Settings > Control Center and then toggle "Access Within Apps" on if it is turned off.You may also like:Gihosoft iPhone Data Recovery


Must Read:Gihosoft Free Android Data Recovery


Must Read:Jihosoft iTunes Backup Unlocker


Jihosoft iTunes Backup Extractor free is a powerful tool to recover and extract important data from iPhone, iPad & iPod touch backup on Windows or Mac.


You may also like:


Gihosoft Total Video Converter is a professional all-in-one video tool that enables you to convert videos and audios into various different formats.


You may also like:online youtube downloader


2. Check If You've Turned On VoiceOver


VoiceOver can also hinder access to the Control Center. If you use VoiceOver, you can access the Control Center by tapping on the time displayed at the top of the iPhone's display (You know VoiceOver is turned on if the time-clock has a small box around it) and then using three fingers, swipe up from the bottom of the display.


If you don't use VoiceOver, you can simply turn it off by going to Settings > General > Accessibility > VoiceOver. If Voice Over was accidentally turned on, you may have to tap on each menu to turn it off.


3. Force Restart the iPhone


It is also likely that a software glitch could be causing the problem. In this case, a restart of the device may fix the problem once and for all. Here's how to force restart your device according to the model;


For iPhone 6 and Older Version


Press and hold the Sleep/Wake button and the Home Button at the same time. Keep holding the buttons until the Apple Logo appears on the screen.


For iPhone 7 and 7Plus


For iPhone 7 and 7 plus, press and hold the Volume Down button and the Sleep/Wake button simultaneously for about 10 seconds. Keep the buttons compressed until the Apple Logo appears on the screen.


For iPhone 8/8 plus and iPhone X


Begin by pressing the "Volume Up" button before releasing it quickly. Then, press the "Volume Down" button and release it quickly. Finally press the "Side" button until you see the Apple Logo on the device.


4. Tip: How to Optimize Controls in iOS 11


Follow these simple steps to delete and re-install controls in your Control Center;


Step 1: Go to Settings > Control Center > Customize Controls


Step 2: To delete a control, locate it in the "Include" section. Tap on the red circle with the minus sign inside it next to the control. Tap "Remove" to delete the control.


Step 3: Restart the device


Step 4: Now go back to Settings > Control Center > Customize Controls


Step 5: Under the "More Controls" section, click on the green circle with a plus sign on it next to the control you'd like to add the Control Center.


Saturday 25 August 2018

How to Delete Messages on iPhone 6 (can be recovered)


How to Delete Messages on iPhone 6 (can be recovered)
1 Erase the Single Text Message iPhone 6

Erasing single message on your iPhone is possible. It is tremendously easy if you want to delete a single message. This option helps to erase any trace of a message between you and the recipient on your iPhone. You can follow the steps below to delete messages on iPhone 6:

Step 1: Open your message on the iPhone

Step 2: Click on the conversation that contains the messages that you wish to delete

Step 3: When the conversation is open, select the message you want to delete and wait for the menu to display. Tap more when the list display.

Step 4: An icon will appear close to each message

Step 5: Click on the icon next to the message to mark the message you want to delete. A checkbox will display to indicate that the message will be removed.

Step 6: Go through all the messages you want to erase on your iPhone

Step 7: Tap the delete icon button at the left corner of your home screen to delete your message.


2 Erase Text Messages Conversation on iPhone 6

Deleting your text messages conversation at once is easy. You can follow the steps below to erase text messages conversation on iPhone 6:

Step 1: Firstly, click on messages to delete a text messages conversation

Step 2: Click on messages at the top right corner to check the list of your conversations

Step 3: When you open your conversation, you will see the list of all your messages conversation

Step 4: Select the conversation you wish to delete. There are two options: Click on the Edit button at the top left corner of your screen or swipe left or right across it. Tap the icon to the left of every conversation you wish to delete from your iPhone.

Step 5: A delete icon will display at the right if you swiped across the conversation.

Step 6: If you use the “Edit” icon, a delete button will display at the bottom right corner of your screen when you select only one conversation.

Step 7: Finally, select any of the buttons to delete the conversation.


How to Permanently Erase Text Messages on iPhone 6 ( unrecoverable) – 3 Steps


Step 1: Delete iCloud Text Message Backup


Step 2: Delete iTunes Text Message Backup


Step 3: Permanently Erase Text messages and Deleted Text messages on iPhone 6
Step 1 Delete iCloud Text Message Backup

iCloud helps to back up all data on your iPhone and saves you from headaches if your iPhone gets missing. It helps to keep information that you may not want to keep like old text messages. If you feel that your iCloud backup is keeping some unwanted texts message, you can follow the steps below to delete iCloud text messages backup:

Step 1: Click on your device settings and tap on “General settings.”

Step 2: Click on “iCloud and Storage Usage”. After, click on the “Manage Storage” under the iCloud section.

Step 3: Click on the message you want to delete under “Backup options.”

Step 4: Scroll down and click “Delete Backup.”

Step 5: Click on “Delete”, and the backup option will be erased completely.


Step 2 Delete iTunes Text Message Backup

If you have low storage on your iCloud to back up to the cloud, you can also use iTunes backup. If the backup contains unwanted messages, you can follow these steps to delete iTunes text message backup:

Step 1: Launch your iTunes.

Step 2: Select the “iTunes” on your window. After select “Preferences.”

Step 3: Tap on “Devices”. A list of devices with the backup stored on your computer will display.

Step 4: Click on the backup you want to delete.

Step 5: Select “Delete Backup” option at the bottom right corner on your menu bar.

Step 6: Click on “Delete” and press “OK” to exit the preferences.


You may also like:jihosoft iphone data recovery
Must Read:Jihosoft iTunes Backup Unlocker
You may also like:online youtube downloader

Friday 24 August 2018

4 Best Places to Sell Your Used iPhone 4/5/6/7 2019

4 Best Places to Sell Your Used iPhone 4/5/6/7 2019


Part 1. 4 Best Places to Sell Your Used iPhone

If the old one has not yet passed its prime and you intend to get a brand new one, you need to ensure you obtain your phone's worth by selling it to the right place. If you know where to look, you could get fair cash for doing this which can after that be put in the direction of handling the cost of the new one. Here, we have done the homework for you and you can go ahead and sell your used iPhone in the following websites:
A Apple

Apple Company needs no introduction as they are the producer of the phone you want to sell. Trading in your Apple iPhone instead of selling it is a wonderful alternative if you want a little profit for comfort and also peace of mind. If you have an older version, this is a potentially simple means to get a new Apple iPhone as trades net you Apple iPhone Store credit, cash money, or gift cards. Even though this is the least rewarding alternative, you additionally will not be liable for any problems with the gadget once it leaves your hands.erase used iphone


BSell to Amazon

On the list of big online stores, Amazon has the first position. Amazon is popular for its trade-in programs and gift cards. The store offers free shipping but the packaging cost will be on you.erase used iphone


C Sell to Gazelle

Gazelle is a third-party trade-in company that offers straight cash (via check or PayPal; they also have an Amazon gift card option) for your device. If your Apple iPhone is broken and no longer turns on, there's a good chance Gazelle will still pay you between $50 and $75. Gazelle tends to offer less for carrier-locked phones, so you may want to unlock your phone before trading it in.erase used iphone


DSell to eBay

If you don't mind putting in a little work-- listing, delivery as well as paying a little sales charge-- eBay is a much better alternative compared to Craigslist for selling your used iPhone. The only downside of this platform is the sales fees eBay.com does charge which is ten percent of the selling price. If you approve payment via PayPal, it charges a charge of 2.9 percent (4 percent if offered internationally) of the final worth.


eBay offers both seller and buyers protection, yet tends to side with the buyer in the event of a disagreement, and scammers know how to take advantage of this. You can reduce this risk by recording every little thing as well as shipping your tool using a trackable service with evidence of shipment.
Part 2. What You Should Do before You Sell Your Used iPhone

Whether you sell your used Apple iPhone by yourself or trade it into a third-party business, there are a couple of things you should do. You should back up all your vital data and delete any other data on the phone. Just deleting or resetting to factory default won’t make the data irrecoverable. You will have to erase everything on it by use of special software.

Back up all your vital data -- calls, images, videos and apps-- using Apple iCloud service or a third-party cloud storage service.

Switch off ‘’Find My Apple iPhone’’: ‘’Find My Apple iPhone’’ is a protection function that has to be turned off before you sell your used -- or no one else will certainly be able to use or reset it.

Sign out your accounts from all applications, services and connected accounts (like iCloud).

Reset to factory settings by going to General > Reset > Reset All Settings to factory settings.

Erase your personal data completely by erase all your data from your used iPhone and protect your privacy.

If you lose any data on iPhone/iPad, Gihosoft iPhone Data Recovery is a good choice to help you easily get back lost/deleted data, including important messages, contacts, voicemails and so on.
Free iTunes/iPhone Backup Extractor for iPhone, iPad.
Jihosoft iTunes Backup Extractor is a powerful tool to recover and extract important data from iPhone, iPad & iPod touch backup on Windows or Mac.
Gihosoft Total Video Converter is a professional all-in-one video tool that enables you to convert videos and audios into various different formats.
You may also like:online youtube downloader

Wednesday 22 August 2018

Top 6 Data Loss Causes and Top 10 Preventions 2019


Top 6 Data Loss Causes and Top 10 Preventions 2019

Data Loss Causes
While data loss may seem unavoidable, with the proper precautions and safeguards in place, it can be prevented. The first step is to understand the primary causes and warning signs for potential data loss. Knowledge is power. Once you have this insight, the next step is learning the top tips for prevention. With this knowledge, you should be able to take the necessary steps to prevent data loss from happening in the first place.
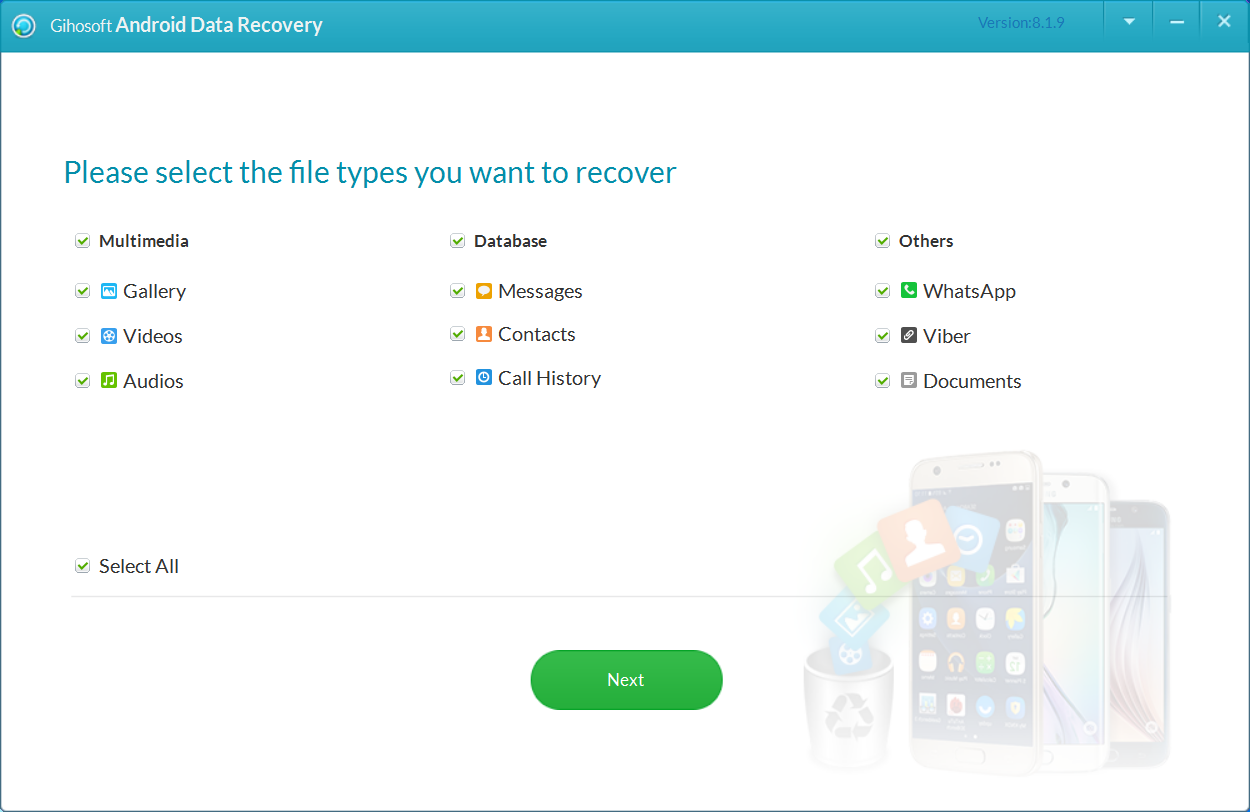

Recommend: With Gihosoft Free Android Data Recovery Software, you are no longer afraid of data loss!


Recognizing the Leading Causes for Data Loss


Here are the top 6 causes of data loss:


1) Hard drive failures


Hard drives fail every day for a variety of reasons. In the US alone, 140,000 hard drives crash each and every week. About 60% of hard drive failures occur due to a mechanical failure, while the other 40% are a result of misuse. A hard disk is a mechanical device with moving parts and thus prone to failure. While some failures occur simply because the hardware becomes worn out, others fail prematurely due to external factors like:You may also like:Jihosoft iTunes Backup Extractor


Overheating


Water or fire damage


Exposure to magnetic fields


Power outages or surges


Impact due to being dropped


There are also internal factors that can cause a failure in the actual file system itself that results in a hard drive failure. These internal failures can be a result of:You may also like:online youtube downloader


File corruption


Software corruption


Drive read instability, which prevents access to the data on the disk


Human error:


Tampering with the file system


Accidental deletions of imperative files


Improper installation and removal of files


Improper drive formatting/partitioning


Sometimes, hard drive failures are caused by a single pinpointed catastrophic event, while other times they fail slowly over time. Here are some of the signs of a failing hard drive:


Repetitive hard drive crashes


Clicking, grinding or screeching noises in a cyclical pattern


Rising number of bad sectors during chkdsk scans


Unusually hot computer temperatures


Issues during the boot-up process


Increasingly slow computer performance during standard processes


Repetitive computer freezes requiring a hard reboot


Files that fail to open, are corrupted or suddenly disappear


Don’t wait until you see the signs of a failing hard drive to back up your data. Get backup software like NovaBACKUP in place that will back up your computer for you in an automated fashion. You should also consider creating an image backup to prepare for disaster recovery scenarios where you want to recover your entire system, including your operating system and your applications rather than just your files.


2) Accidental deletions (user error)


Every day we create, update, save and delete files. It is just part of our everyday business life. It’s no wonder that sometimes, we delete files or overwrite files by accident. We are all human, and the reality is we make mistakes. Sometime the Windows Recycle Bin can offer a safety net, but there are several scenarios when you simply cannot count on the Recycle Bin to come to the rescue. Here are a few situations in which the Recycle Bin may be bypassed:


Files deleted from drives, like those accessed over a Network, which don’t have a Recycle Bin


Files that are larger than the capacity of the drive that the recycle folder resides on


Files that are permanently deleted using Shift + Delete


Files deleted using the Windows Command Prompt


Another common source of accidental deletions is email. According to a survey of over 200 Ontrack®PowerControls™ customers, a leading mailbox recovery software solution, over 60% of users reported receiving up to 5 email restorations requests per month. Restoring an entire Exchange Server from a backup is a time consuming process. With software like NovaBACKUP Business Essentials, which includes single mailbox restore, you can restore just the emails or mailboxes you need.


The last type of accidental deletions come as a result of users deleting system files that are critical to the proper functioning of the entire computer. No matter what type of accidental deletion occurs, having the proper backup in place could save your bacon.


3) Computer viruses and malware infections


There are new viruses that pop up every day that put your data at risk. According to a B2B international survey, 35% of IT specialists reported that their companies had lost data due to malware infection.


While being connected to the internet has its benefits, it also comes at a cost. The most common means of entry into your computer is through email-based attacks (21%), the second is through phishing (17%). Computer viruses are a very real threat. They have the ability to destroy, steal or encrypt your data, and in some cases completely corrupt the hardware of your computer or infiltrate your entire network.


Some of the more recent viruses, known as crypto-ransomware are responsible for earning hackers millions of dollars by holder users data for ransom. As these users face the potential reality of data loss, many are opting to pay the ransom over losing their data. Cryptowall has cost US businesses and consumers $18 million in just over a year (April 2014 to June 2015) according to the FBI’s Internet Crime Complaint Center.


With the latest variant Cryptowall 3.0 now spreading like a wildfire, it wouldn’t surprise me to see that number double or even triple over the next year. Much like its predecessors Cryptolocker, these viruses encrypt victim’s data, rendering it useless without a decryption key, which of course is offered for a fee. If these victims had a proper backup in place and stopped paying up, these criminals would not keep coming up with new forms of the virus. As long as we keep paying, they will keep building new variations of these dangerous and costly forms of ransomware.


Once again, if you had a properly backup in place, and you became a victim of any of these strains of crypto-ransomware, you could simply restore your files from your backup rather than lining the pockets of these hacker thieves that are banking on the fact that many users do not.


4) Laptop theft


The statistics on laptop theft are astounding. According to Gartner, a laptop is stolen every 53 seconds. If you think it won’t happen to you, chances are you’re wrong. Be ultra cautious and don’t ever leave your laptop unintended. Think of it this way. Would you leave a stack of hundred dollar bills on a table unattended even for a second? Then don’t leave your laptop unattended. If you have to leave your laptop in your vehicle, make sure it is not visible. Crime is often opportunistic. Smash and grab crimes are often prompted by the thief seeing something of value in plain view. While you might think that the cost of replacing the stolen laptop is costly, studies reveal that 80% of the cost is actually a result of the data breach.


Full-disk encryption or the ability to wipe a computer remotely for laptops that contain critical and confidential data is paramount to protecting your business from a data breach. Having a proper backup in place, will also ensure that you don’t lose that critical data.


5) Power failures


Power outages and power surges are bad for your computer and your data. While you may think that the unexpected loss of power to your computer might pose a relatively low risk, in reality that may not be the case. When there is a power outage or power surge that results in an unexpected shutdown of your computer, it takes its toll on the components of your computer. Operating systems are complex and must follow proper shut-down procedures to make sure all processes run properly. A sudden loss of power can interrupt these delicate procedures rendering your computer inoperable.


Imagine if you will that your hard drive is busily writing data to the disk, when all of a sudden, power is lost and it shuts down right in the middle of its process. On a good day, you may just lose a single file or part of a file. Now imagine if your hard drive was writing to the file system, which is critical for the booting process, and your computer loses power. That file could become corrupt, and now you can’t reboot your computer at all. Not good.


When power outages, surges and hard-reboots happen on a frequent basis, it can reduce the hard dives lifespan. Every time a computer restarts after a sudden loss in power, the read and write head, is quickly reset to its original position causing small imperfections on the disk. These imperfections accumulate over time and increase the likelihood of a head crash, which effectively destroys the hard drive. Again not good.


Power surges also pose a risk to computer hardware. Surge protectors are one way to protect yourself from a power surge. But even a surge protector won’t protect your computer in case of lightening. Losing your computer may be painful, but losing all of the data on your computer would be more painful. Having a good backup, would protect you in the event of a power-related data loss.


6) Damage due to spilled coffee or water


Electronics and liquids do not play well together. When you spill any sort of liquid, whether it be water, coffee or other any other beverage for that matter, you run the risk of short-circuiting your entire computer. When liquid seeps into the laptop through the keyboard, which is connected to the laptops motherboard via a ribbon cable, it can cause the keyboard to stop working altogether. Simply drying off your computer may not be enough.


Follow these instructions to try to save your laptop from liquid damage. Essentially, you will want to immediately shut down your computer, dry it off, remove all removable parts, make sure they are dry and clean of any residue, and then wait at least 48 hours to ensure that everything is completely dry before you reassemble your computer and hope for the best.


The unfortunate part is that sometimes a spill can go much deeper than just the keyboard, damaging the parts below. When the spilled liquid contains sugar or any acidic ingredients it can cause corrosion, which could eventually destroy the touch pad, the processor, the memory and even the entire motherboard. If you are able to get your computer to start up again after a spill, do yourself a favor and immediately create an image backup of your computer. If the liquid spill causes your device to short out someday in the future, you can at least use that image to get back up and running with a new computer as quickly as possible.


Take Preventative Action to Avoid Data Loss


Here are the top 10 steps you can take now to prevent the agony of data loss later:


Keep your computer clean and dust-free


If your PC gets hot, take it apart and clean it


Save and backup your files regularly, to multiple locations


Create an image backup BEFORE the first signs of hard drive failure


Keep your anti-virus software up to date


Don’t open suspicious emails or attachments


Don’t leave your laptop unattended


Use a surge protector


Don’t delete files you don’t know what are, especially system files


Don’t keep liquids close to your laptop


Should you experience data loss, having a solid backup of your data can help you get your lost data back. If you are not backing up your computer, you need to start now. With a backup software solution like NovaBACKUP, you can create a file back, an image backup or even just a copy of your files to a secondary device in an automated fashion so you are prepared for any of these data loss scenarios. With so many options for backing up your computer, there is really no reason to leave your data unprotected.


Top 6 Data Loss Causes and Top 10 Preventions 2018


More Tips for You:


No Need to Cry for Accidentally Deleting Files on Android


2 Methods to Recover Deleted Contacts from Samsung Galaxy Phones


How to Recover Deleted and Lost Videos/Music from Android


How to Recover Deleted Data from LG V30/V20/V10/G7/G6/G5


Android SMS Recovery: Recover Deleted Text Messages on Android


How to Recover Deleted Photos from Android Internal Storage


Monday 20 August 2018

How to Backup and Restore Contacts on iPhone

How to Backup and Restore Contacts on iPhone

How to Backup and Restore Contacts on iPhone

Part 1: Backup and Restore Contacts on iPhone via iTunes

With the traditional way, you can backup and restore them via iTunes. iTunes will help you create a full backup for almost all your contents except the contacts.
Backing up iPhone including contacts:


Connect your iPhone or other apple device to your Mac or PC.


Launch iTunes if does not open automatically.


Click on the small iPhone icon in the top left corner. Sometimes the device summary may not show on some devices.


Click ‘Back Up now’.


Restoring iPhone including contacts:


Launch iTunes and connect your iPhone/iPad/iPod touch to your PC.


Right-click your iPhone, iPad, iPod touch under the devices list and click ‘Restore Backup’.


Select the latest backup entry according to the recent dates.


Click Restore.


Note

Restoring your backup will erase all media tracks currently existing on your iPhone.
Part 2: Backup and Restore Contacts on iPhone via iCloud

Using iCloud is another trusted method of backing up and restoring your contact information. To restore the contacts, calendars and reminders, Apple owns the iCloud options for you too. You can keep your contacts safe using an Apple account.
To back up iPhone including contacts:


Go to the Settings > iCloud > Backup on your iOS device.


Make sure you are on a WiFi connection and tap Back Up Now.


To restore iPhone including contacts:


Go to Settings -> General -> Reset, then tap “Erase all content and settings”.


On the Apps & Data screen, tap Restore from iCloud Backup, then sign in to your iCloud account.


Then select one from a list of all backups in your account. (You can go to Settings -> [your name] -> iCloud -> Storage -> Manage Storage (or Settings -> iCloud -> Storage -> Manage Storage) to see the date and size of its latest backup.)


Note


The restoration process only restore those contacts already saved and backed up in your iPhone. The current ones will be missing with this process.


Meanwhile, the free iCloud storage is limited to 5G which means that you cannot make a complete backup if it is full.

If you can’t sync with iTunes and want to rescue data from a disable iPhone, you could try Gihosoft iPhone Data Recovery. Also feel free to ask questions on the iDevice is disabled error in the comments section below.

Download iOS 13.2 and iPadOS 13.2 Beta 2

Apple today released the second developer beta of iOS 13. 2 and iPadOS 13.2 for all compatible iPhones and iPads. The first beta of iOS 1...